Note: this article was published originally as the 5th chapter in my Relearning MSX series. Cover photo by Markus Vordermeier. Used under permission.
(This is a long post. If you're reading it from the blog's list of posts then be sure click the "Read more" button to read the whole text.)
It's about time we start doing real work. This is what we will do next:
- Set up the emulator (openMSX) that we will use for development
- Set up the storage device (hard drive)
- Download and install MSX-DOS2, MSX-DOS2 TOOLS, MSX-C v1.2 and MSX-C Library
- Create a few batch files to set up the environment at boot and compile C programs
- Compile a simple test program in C
I won't go deep into technical details or long explanations for now. I'll assume that you're new to MSX computers and aren't familiar with the equipment nor the software.
Also, if you have a real MSX2 (or higher) with a hard drive then feel free to use it instead of the emulator. However, unless you have an MSX turbo R then it's still a good idea to work in the emulator, to speed up compile times.
Please post a comment below if at any time you have questions, or there's something that I didn't explain clearly enough.
Without further ado...
Setting up an MSX emulator
An emulator is a program that simulates a computer inside another computer. Its purpose is to run software that was written for a different computer platform. In this case, we will use an emulator to run MSX software on a Mac or a Windows PC.
We will use openMSX just because it's my favorite, but feel free to use a different emulator if you prefer. openMSX is available for OS X, Windows, Android, and can be easily compiled on Linux. Go to their homepage (http://openmsx.sourceforge.net), download the package appropriate for your computer, and install it.
If you try and run openMSX now as it is you'll see the splash screen below, followed by an error message:
C-BIOS splash screen under openMSX
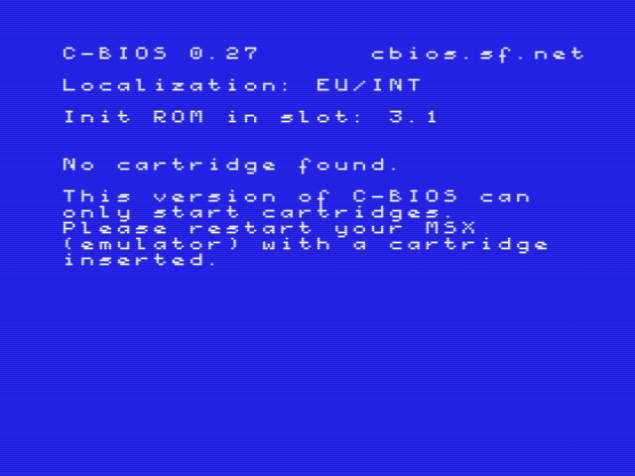
C-BIOS message under openMSX
What you're seeing is C-BIOS, which wasn't part of any MSX computer. The reason why you're seeing this screen is that the emulator software only simulates the electronic parts (hardware) that compose the computer. However, every computer also requires some software to be able to start up and run programs. In the case of the MSX, that software is inside a memory (ROM), and in many cases it can't be distributed with the emulator because the copyright still belongs to ASCII or Microsoft.
C-BIOS was written from scratch by MSX users as a partial solution to this problem. It allows emulator developers to distribute a minimal base software on which to run cartridge software. It is freely distributable, and openMSX is one of the emulators that include it by default.
We won't be using it C-BIOS because we wouldn't be able to boot to the operating system and develop software. Instead, we'll set up openMSX to run as a Panasonic FS-A1GT, the last MSX computer built.
Panasonic FS-A1GT. Photo from msx.org.
This computer came with MSX-DOS2 embedded, so we won't need to add it as an extension to the emulator.
To speed up MSX-C compile times we will also add a hard drive to the emulated computer. We will use the Sunrise ATA-IDE interface. This wasn't an official peripheral, but it was a very professionally-built device. It came with a 40-pin parallel ATA connector on the top side of the case were you could attach any standard PC hard drive. There was also a later version that used Compact Flash cards instead of a hard drive, but is otherwise equivalent.
We will set up openMSX to emulate a 128 MB hard drive attached to the emulated MSX.
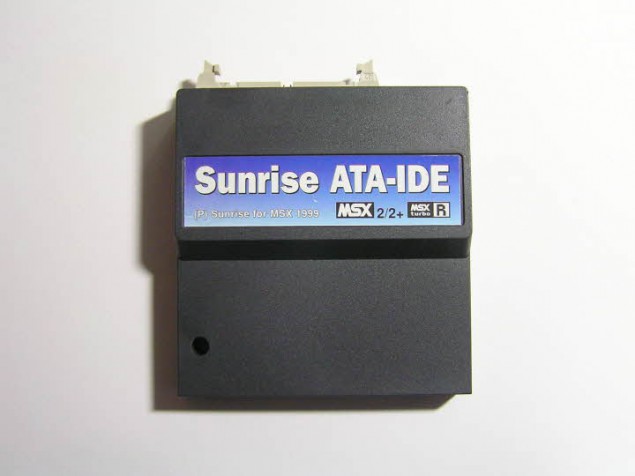
Sunrise ATA-IDE cartridge. Photo from msx.org.
Run openMSX now if you haven't done so yet, then quit the emulator when you see the C-BIOS error message. This will create the openMSX folder structure under your home directory.
Download the ROMs
First, download the following files from msxarchive.nl:
- Panasonic FS-A1GT firmware: fs-a1gt_firmware.rom
- Panasonic FS-A1GT kanji ROM: fs-a1gt_kanjifont.rom
- Sunrise ATA-IDE firmware: ide250.zip
Put these three files in the systemroms folder of your openMSX directory. The default location is:
- OS X: ~/.openMSX/share/systemroms
- Windows: C:\Users\your_user_name\My Documents\openMSX\share\systemroms
Next, we'll confirm that the emulator runs properly as a Panasonic FS-A1GT with the ATA-IDE extension.
If you're on a Mac: open the Terminal application (it's under Applications > Utilities), and run this command (this assumes that you put openMSX under /Applications):
/Applications/openMSX.app/Contents/MacOS/openmsx -machine Panasonic_FS-A1GT -ext ide
If you're on Windows: right-click the openMSX icon on the Start menu, then click Properties. Go to the Shortcut tab and add the following parameters at the end of the Target field:
-machine Panasonic_FS-A1GT -ext ide
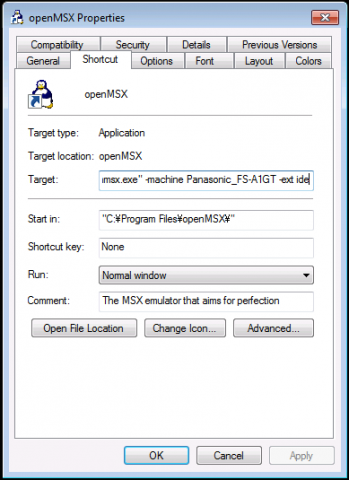
openMSX shortcut properties on Windows, after adding the machine and extension parameters.
After editing the shortcut, click OK and then click the openMSX icon in the Start menu.
If you installed the ROMs correctly then you should see the Panasonic FS-A1GT boot screen inside the openMSX window:

Panasonic FS-A1GT booted to MSX BASIC under openMSX
If this is what you see then before going on enter the following MSX BASIC commands one by one, and press ENTER after each one:
SCREEN 0
WIDTH 80
SET SCREEN
The first one changes the screen to a text-only mode that supports up to 80 columns of text. The second command changes the screen to 80 columns of text per row, and the last one saves these settings in the computer's non-volatile memory, so the next time the MSX restarts it will go directly to the 80-column text mode.
If you reset the MSX now you should see something like this:
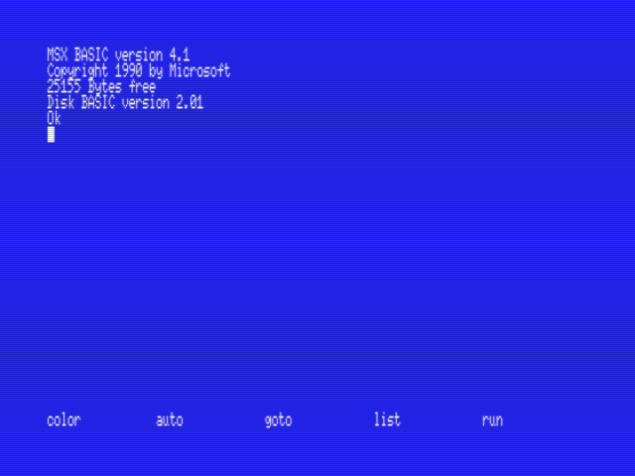
Panasonic FS-A1GT booted to MSX BASIC in SCREEN 0
At this point the MSX screen may be too small to comfortably read text on your computer screen. If that's the case then go into the openMSX menu (press CMD+O on a Mac, or the Menu key on Windows), then go into Video Settings and increase the value of Scale Factor until the text size is big enough to be comfortable to read.
Set up the storage
Next we'll create a 128 MB virtual hard drive to store development files (and any other files you want to store in your emulated MSX). This disk will be split in four 32 MB partitions because of limitations in MSX-DOS2 that I won't discuss now.
Start openMSX (if it isn't running already) and open the openMSX console (CMD+L on a Mac, F10 on Windows), and enter the following commands one by one:
set power off
diskmanipulator create MSXC12HD.dsk 32m 32m 32m 32m
hda MSXC12HD.dsk
set power on
set save_settings_on_exit on
These commands will power off the emulated MSX, create a 128 MB disk with four 32 MB partitions (this command will take a while to complete), attach the new disk image to the virtual MSX, turn it on, and ensure that settings will remain saved after the emulator is restarted.
At this point we're emulating the following computer setup: a Panasonic FS-A1GT with an ATA-IDE interface to which there's a 128 MB generic hard drive connected.
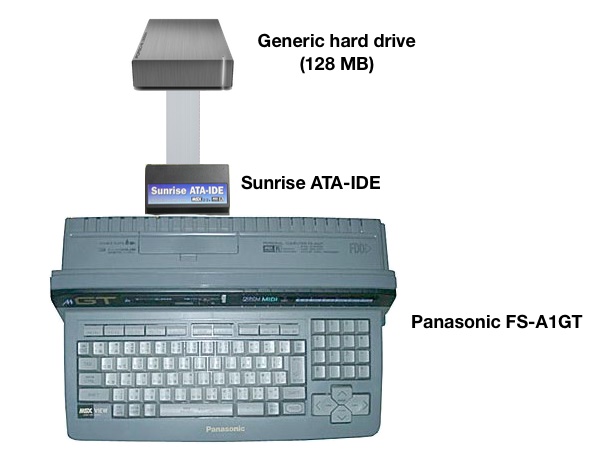
We need to make sure that the emulator will always use the MSXC12HD.dsk hard drive image that we created. To do this we modify the command line to launch openMSX:
- On a Mac, add -hda MSXC12HD.dsk to the command line
- On Windows, edit the openMSX shortcut again and add -hda MSXC12HD.dsk to the end of the shortcut's Target field
In the following posts we'll install MSX-DOS2 in the hard drive, then MSX-DOS2 TOOLS, plus a couple other utilities that will be useful in the future. After that, we'll set up MSX-C v1.2 and compile a short program.


#181 by Warmize
Posted on 28/Jun/2017 10:57:29
Thank you for the post.
What kind of projects do you develope in C? Which libraries are there available?
I would be interested in developing a game in C but I haven't heard anyone using C for this...